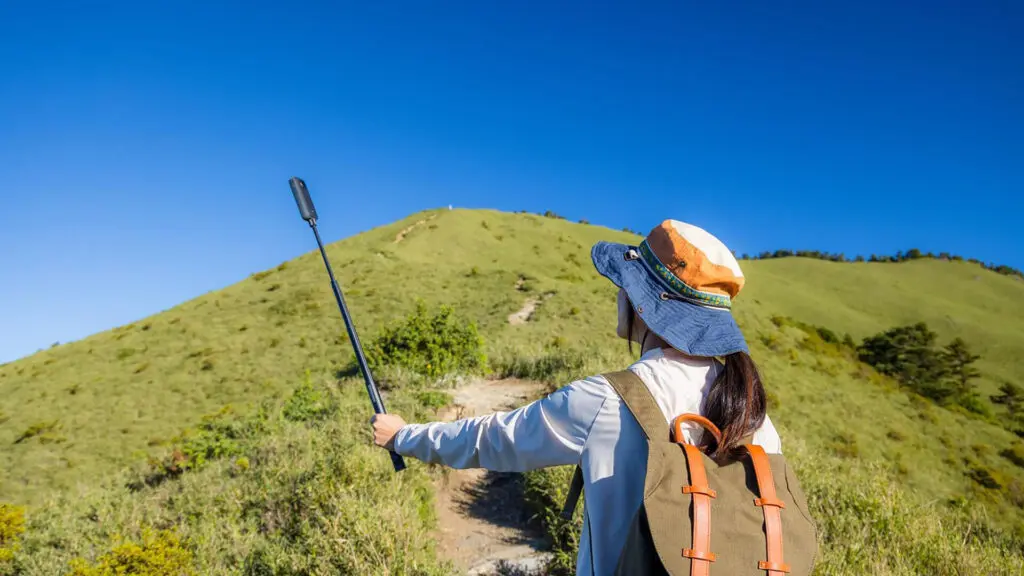
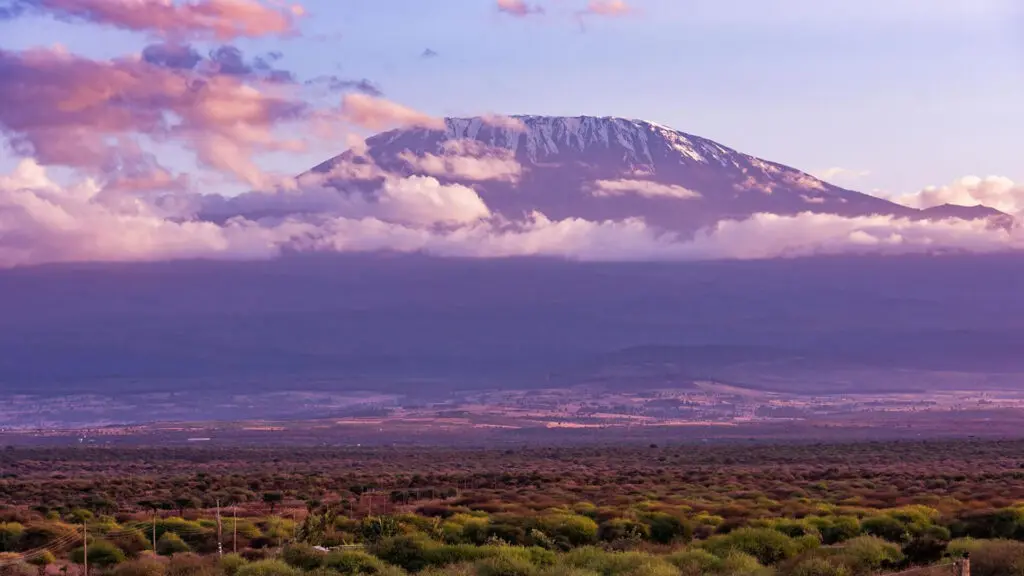
Preparing to climb Mount Kilimanjaro (5,895 m/19,341 ft) is as much about building endurance and strength as it is about mindset. The trek is non-technical, but hiking for days in thin air is a serious challenge. The good news is you don’t need to be a pro athlete – people of varying fitness levels reach Uhuru Peak every year. The vast majority of climbers, in fact, are adventure-hungry travelers like you — determination and a respect for the mountain are the key ingredients to success!
With the right training plan and six months of preparation, you can build the fitness and confidence to enjoy your Kilimanjaro adventure safely. How do you train for six days of uphill trekking? In a word: progressively. This 6-month plan breaks your training into phases – a gradual build-up of cardio endurance, leg and core strength and hiking practice.
This guide will cover how to adapt the plan to your lifestyle (whether you’re training at home, in the gym, or on trails), ways to simulate high altitude, and expert tips on rest, gear, and acclimatization. By following a structured approach, you’ll be ready to go all the way to the Roof of Africa.
For a better idea of Kilimanjaro’s routes and the tour options available for trekkers, explore our Kilimanjaro Guided Tours.

Phase 1: Foundation (Months 1-2)
Goal: Build a base of aerobic fitness and essential strength while getting into a consistent workout routine. In the first two months, focus on creating sustainable habits and starting slow. This means short, regular workouts rather than long, infrequent ones.
Cardio for 20-30 Minutes, 3-4×/Week
Begin with moderate cardio like brisk walking, jogging, cycling, or swimming. Aim for about 20 minutes per session in Week 1, and gradually increase to 30+ minutes by the end of Month 2. Keep the intensity conversational – you should be able to chat while moving.
If you’re very new to exercise, start with fast walking. More experienced? Gentle runs or uphill walks are great. Consistency is key: try not to skip the planned days so that exercise becomes a habit (research suggests it takes ~30 days to form a habit).
Strength & Core – 2×/Week
Incorporate basic bodyweight exercises to begin strengthening the muscles used in trekking. Examples: squats and lunges for your legs, push-ups or resistance-band rows for your upper body, and planks or sit-ups for core.
In Phase 1 of your Kilimanjaro training, use little or no added weight – focus on form and endurance (high repetitions). Each session could be about 20–30 minutes. This builds a foundation in your quads, glutes, calves and core that will protect your knees and back during long hikes. Don’t worry if you can only do a few reps at first; you’ll build up over time.
Short Hikes – 1×/Week
If possible, do a hike or long walk on the weekend. Start with an easy 1–2 hour hike on flat or gentle terrain. Wear the hiking boots you plan to use on Kilimanjaro to begin breaking them in early. Early use helps you avoid blisters later and lets you adjust if the boots cause discomfort.
No hills near your home suitable for training? A long urban walk or even a treadmill incline walk can substitute (set a slight incline on the treadmill to mimic uphill walking). The key is getting used to being on your feet for extended periods. Each week, try to add a little time or distance – e.g., start with 3 miles, build to 5+ miles. By the end of Month 2, a 5-6 mile (8-10 km) flat walk should feel comfortable, which is a good fitness benchmark.
Rest & Recovery
Schedule at least 1–2 rest days per week in this phase. Your body needs time to adapt, especially if you’re new to regular exercise. Watch for excessive muscle soreness – it’s expected to be a bit sore a day after new workouts, but if you’re very stiff or in pain, take an extra rest day and resume training gradually. Also, develop good habits like warming up (5–10 minutes of easy movement and stretches) before workouts and cooling down after; this helps prevent injury.
Milestone: By the end of Month 2, aim to comfortably hike ~3-4 hours total a week (e.g., a 6-8 km hike plus a couple of short cardio sessions). If you can jog continuously for 20-30 minutes or climb a few flights of stairs without getting winded, you’re building a solid base.
Getting excited thinking about your own Kilimanjaro adventure? Read about the Kilimanjaro routes you could take: Pristine Trails’ Kilimanjaro Routes.
Example Kilimanjaro Training Schedule: Months 1-2
| Monday | Cardio | Brisk walking, jogging, cycling, or swimming |
| Tuesday | Strength & Core | Bodyweight squats (x3 sets), bodyweight lunges (x3 sets), bodyweight calf raises (x3 sets), push-ups (x3 sets), plank (aim for one minute) |
| Wednesday | Rest | Move your rest day around to suit your own schedule, and don’t be afraid to take more if you feel it is necessary |
| Thursday | Cardio | Brisk walking, jogging, cycling, or swimming |
| Friday | Strength & Core | Bodyweight squats (x3 sets), bodyweight lunges (x3 sets), bodyweight calf raises (x3 sets), push-ups (x3 sets), plank (aim for one minute) |
| Saturday | Cardio | Brisk walking, jogging, cycling, or swimming |
| Sunday | Short Hike | A 1-2 hour hike on flat or gentle terrain |

Phase 2: Building Strength & Stamina (Months 3-4)
Goal: Increase training intensity and hike duration. Over months 3 and 4, you’ll gradually push your cardio workouts longer, add elevation gain to hikes, and introduce weighted packs and harder strength exercises. This phase is about turning your foundation into mountain-specific fitness.
Longer Cardio & Hiking – 4×/Week
Start extending one of your weekly cardio sessions into a longer effort. For example, by Month 3, try one 45-60 minute cardio workout per week (jog, bike, or brisk uphill walk). Maintain 1-2 shorter cardio sessions (20-30 min) on other days for variety, including perhaps some intervals or faster-paced sections to boost your aerobic capacity.
On weekends, gradually make your hikes longer and hillier. Aim to work up to 4-6 hour hikes with significant elevation gain by the end of Month 4. If you live near hills or mountains, this is the time to tackle them. Increase your elevation gain incrementally (for example, 500 m (~1,600 ft) ascent one weekend, 700 m the next) to let your legs adapt. No access to trails? Improvise with stairwells, uphill treadmill sessions, or stadium steps.
Remember to also practice hiking downhill – descents can be surprisingly challenging on your quads and knees. In fact, on Kilimanjaro, you may descend 14,000+ ft in just two days, so include hikes or stair workouts where you go down as much as up. If you’ve been using a treadmill or stepper, mix in actual outdoor walking if possible, as uneven terrain and varied conditions will engage your muscles differently.
Strength Training – 2-3×/Week
By now, your bodyweight exercises should feel easier. In Month 3, start adding some resistance: this could mean holding dumbbells during squats/lunges, using a backpack with a few kilos of weight for step-ups, or doing more challenging moves like step-downs (to train for downhill) or box step-ups. Focus on legs and core stability. Great exercises at this stage include: squats, lunges, step-ups, calf raises (for calves/ankles), planks, and bicycle crunches (core), and exercises for hips like side lunges or side steps on a stair.
Aim for 2-3 sets of 15-20 reps rather than max weight – you’re building muscular endurance. If you belong to a gym, you can integrate leg press, stair machines, or cycling classes to build leg strength. Also include some upper body work (light rowing, shoulder presses, or push-ups) so that using trekking poles and carrying your daypack feels easier. By the end of Month 4, you might do 30–45 minutes per strength session and feel noticeably stronger on hills.
Weighted Pack Practice
Start training with a daypack as your strength improves. Most trekkers on Kilimanjaro carry a daypack of around 5-6 kg (~10-12 lb) with water, jacket, camera, etc., since porters carry the rest. You don’t need to train with a huge, heavy backpack – in fact, overloading can risk injury without much benefit. Instead, gradually work up to ~5-8 kg in your pack during training hikes. For example, in Month 3, put 3 kg of water bottles in your pack on a short hike; by Month 4, aim for a 6-8 kg pack on a longer hike. This gets your shoulders and back used to the weight and helps toughen your feet and hips for carrying a load.
Never exceed the typical Kilimanjaro pack weight in training – the goal is familiarity, not brute strength. If you’ve been jogging or doing stair climbs without a pack, you can optionally try some with a light pack now (except avoid running with a heavy weight to protect your knees.
Increasing Frequency & Recovery
By the end of Phase 2, you might be training 4-5 days per week, with a typical week including two moderate cardio sessions, one longer endurance session (long run or hike), and two strength-focused sessions (which could be on the same days as short cardio).
Always listen to your body and incorporate rest weeks: many trainers advise three weeks of build followed by one lighter week. For instance, after three escalating weeks, take a week to cut back the volume (shorter, easier workouts, and an extra rest day) to let your body recover and prevent overtraining. This kind of cycle can boost your progress and reduce injury risk.
Milestone: By Month 4, you ideally can hike 6+ hours on a challenging trail (or climb ~100 flights of stairs) in a day and still function fine the next day. You should also be comfortable carrying your daypack and using your gear. For example, doing back-to-back 4-hour hikes on a Saturday and Sunday is a great training achievement that simulates trekking on consecutive days. Cardiovascularly, you might be able to run 5-6 miles continuously – a useful fitness indicator for high-altitude trekking. Keep in mind, altitude will slow you down, so being able to sustain effort is more important than speed.
Example Kilimanjaro Training Schedule: Months 3-4
| Monday | Cardio/Hiking | 20-30-minute session (consider adding interval training or faster-paced sections to increase aerobic capacity) |
| Tuesday | Strength | Resistance workout, Squats, lunges, calf raises, step-ups, planks, bicycle crunches, side crunches, side steps on stairs, leg press |
| Wednesday | Cardio/Hiking | 45-60-minute session (a jog, bike ride, or brisk uphill walk) |
| Thursday | Strength | Resistance workout. Squats, lunges, calf raises, step-ups, planks, bicycle crunches, side crunches, side steps on stairs, leg press |
| Friday | Cardio/Hiking | 20-30-minute session (consider adding interval training or faster-paced sections to increase aerobic capacity) |
| Saturday | Cardio/Hiking | 20-30-minute session (consider adding interval training or faster-paced sections to increase aerobic capacity) |
| Sunday | Rest | Again, move your rest day to best suit your needs |
Phase 3: Peak Training & Acclimatization Prep (Months 5-6)
Goal: In the final two months, push your training to “trek-ready” levels, then taper off and rest before your trip. This phase will include your longest and highest-volume training, plus specific preparation for altitude and gear. The motto here is “train hard, trek easy” – challenge yourself in training so the actual climb feels doable.
Weekly Long Hikes – Simulate the Trek
Plan several big hikes in Month 5. Ideally, once a week (or at least 2-3 times in this phase), take a hike that lasts 5-8 hours with significant elevation gain (~800-1200 m up and down). This might mean a full-day hike starting early, or splitting into a long morning and afternoon session. These endurance hikes are the crown jewel of your training – they build mental and physical stamina for summit day.
Go at a steady, slow pace (remember “pole pole”) and use these outings to practice everything: your pace, nutrition (snacking and hydrating as you go), layering clothing, and dealing with weather changes. If possible, do a back-to-back hike weekend: e.g. a 6-hour hike Saturday and a 4-hour hike Sunday. Being able to hike on tired legs simulates the fatigue of multi-day trekking. Such back-to-back training will make the actual Kilimanjaro itinerary much more manageable.
Maximize Leg & Core Strength
In Month 5, continue strength workouts focusing on high reps and good form, but you can introduce some heavier weights for key exercises if you feel comfortable. For example, add heavier dumbbells for squats or use a weight machine at the gym to strengthen quads and glutes.
Strong legs will carry you through long summit pushes, and a strong core will stabilize you on uneven terrain. Don’t neglect the downhill muscles: do exercises like slow step-downs from a box or eccentric squats (taking a longer time lowering down) to condition your knees and thighs for descending. Many people find the descent from Kibo summit as tough as the ascent due to the strain on knees – preparing your muscles for braking downhill will help.
Also, keep up core work (planks, twists, Pilates moves, etc.) – you don’t need six-pack abs, but a stable midsection prevents back aches when carrying a pack. By the end of Month 5, you might be doing 60+ minutes of mixed strength training per week (broken into two sessions), and feeling strong and balanced.
Train with Full Gear
By now, all your gear should be tested and broken in. Always hike in the boots you’ll use on Kilimanjaro – if they’re not fully comfortable yet, do not use any other shoes until they are, as well-worn boots are crucial to avoid blisters. Hike with the same backpack you plan to bring, adjusted to fit you well.
You should be very familiar with taking things in/out of it, adjusting straps, etc. Aim to carry roughly the actual weight you’ll have on the mountain (around 5-7 kg) on all your long hikes now. If you plan to use trekking poles, practice with them regularly on hikes so you develop a good rhythm and know how to adjust them. Trekking poles are especially helpful on steep ups and downs – they can take pressure off your knees during the big descent.
Start to use poles at least a month before your trip, so they feel natural by the time you’re in Tanzania. Also, practice layering your clothing and dealing with rain, cold, or heat on your training hikes. Don’t shy away from hiking in less-than-ideal weather – if it’s raining or chilly on a day you planned a hike, go anyway (as long as it’s safe). This will let you test your rain gear and get used to moving in wind or rain. It’s better to discover issues during a practice hike than on the mountain.
Altitude Simulation (Optional)
The high altitude on Kilimanjaro presents a unique challenge. While you cannot fully acclimate before you go (acclimatization largely happens on the mountain), some people try to pre-acclimate or at least prepare their bodies for thin air. If you live at a low elevation, consider these options in Month 5 or 6.
Try to hike at altitude. It can be valuable to take a weekend trip to a nearby high point (for example, a 3,000+ m mountain or ski resort). Even one or two days hiking above 2,500 m (8,000+ ft) will expose you to thinner air and give you a sense of how your body reacts. It’s not complete acclimatization, but any experience helps.
Some gyms or training centers offer hypoxic chambers or altitude training rooms where you can exercise in low-oxygen conditions. Typically, these require 4-6 weeks of regular sessions to have an effect. Another method is altitude training masks that restrict oxygen—these are more accessible, but their effectiveness varies. Use these tools only if you have access and budget; they’re certainly not essential, but they can boost your confidence and are worth considering if you happen to have easy access.
Taper Before Departure
In the final two weeks of Month 6 (right before your climb), scale back your training to allow full recovery. Think of it as a taper: reduce your workout intensity and volume to 50-60 %. For example, if you were hiking 8 hours on weekends, cut that to 3-4 hours, and focus on staying loose and limber rather than pushing your limits. Continue light cardio and easy walks to keep your legs moving, but avoid very long runs or heavy lifting.
Milestone: In Month 5, you’ve hit peak training – perhaps a culmination like a 10-15 km hike with 1000 m gain carrying your pack, or a solid week where you trained 5 days out of 7, including various activities. By Month 6, you might notice you’re in the best shape of your life: able to tackle stairs, hills, and long walks with ease. Celebrate the progress and trust your training. Two weeks before the climb, the hard work is done.
Example Kilimanjaro Training Schedule: Months 5-6
| Monday | Rest | If you plan back-to-back long hikes on Saturday and Sunday, take a rest on the following Monday |
| Tuesday | Mixed Strength Training | Strength workout with high reps and good form. Focus on leg and core strength to build “uphill” and “downhill” muscles |
| Wednesday | Long Hike | A 5–8-hour hike split over morning and afternoon/evening sessions |
| Thursday | Mixed Strength Training | Strength workout with high reps and good form. Focus on leg and core strength to build “uphill” and “downhill” muscles |
| Friday | Rest | A rest day to break up midweek sessions and the back-to-back long hikes at the weekend |
| Saturday | Long Hike | A 5-8-hour hike with elevation gain (~800-1200m up and down) |
| Sunday | Long Hike | A 4-5-hour hike with elevation gain (~800-1200m up and down) |
Gear Up for Kilimanjaro
By starting your gear prep in tandem with training, you avoid last-minute surprises. Here’s a quick training gear checklist:
Boots: Choose quality hiking boots (mid- or high-cut) that have been broken in over many miles. Train in the socks you’ll use on the mountain, too, to ensure they’re comfortable.
Backpack: A daypack ~30 liters with waist straps. Practice packing it with 3-8 kg and adjust it to fit well. You should be at ease wearing it for hours.
Trekking Poles: These are adjustable, lightweight poles. Use them on training hikes (especially downhill) to become skilled with them. If you don’t have your own, poles can be rented in Tanzania for use during your trek.
Clothing Layers: Wear the same layers (base layers, fleece, waterproof jacket, etc.) on some training hikes to test their warmth and breathability in different weather.
Hydration & Nutrition: Get used to drinking water regularly as you hike, with either a hydration bladder or water bottles, and snacking on trail mix or energy bars. Find what foods give you energy and sit well in your stomach during exercise.
Check out our Mountain Treks Packing List for a more in-depth look at packing.
Mental Preparation for Kilimanjaro
Finally, build your mental resilience. Long training hikes in rain or slogging up endless stairs also train your mind to handle discomfort. Remind yourself why you’re doing this – the sunrise over Tanzania from Uhuru Peak will be well worth it. And as challenging as training can be, trekking Kilimanjaro is not a sprint; it’s a marathon. The right attitude, as much as physical fitness, will get you to the top.
By following this six-month plan, you’ll arrive in Tanzania in great shape, ready to hike high and smile wide. You’ll have the endurance to walk 5-7 hours day after day, the leg strength to tackle steep sections, and the confidence that you’ve done everything possible to prepare. Equally important, you’ll know your gear and your pace, which eases a lot of pre-climb anxiety.
Remember that summiting Kilimanjaro is a team effort: listen to your guides, go pole pole, and take care of yourself with proper rest and hydration during the trek. With training in your legs and these tips in mind, you’ll be well on your way to a successful and enjoyable Kilimanjaro climb. As the saying goes, Kilimanjaro is climbed one step at a time – you’ve spent months training for those steps, now go conquer the mountain!
Now, browse our Kilimanjaro Mountain Tours to find the perfect adventure for you. If you have any questions at all, please get in touch.

")